Tuesday, July 10, 2012

Manual "Simon" style B

In addition to Endless Biking suspension compression down and forward, Manual can be done by:
1. No suspension engagement
2. Moving hips back just before the front wheel hits the drop (timing is everything) AND creating pressure on the palms of the hands.

Advantage of this move: it is very predictable and one does not rely on suspension response.
There is also racer style execution where the rider extends feet in the air reducing the height of the drop
Here is the video:

Arrows on the picture below indicate: pressure on the palms of the hands, hips back creating such palm pressure. Notice that vertical arrow indicates that the rider moves quite back over the rear tire for a split second. No suspension preload is used (unlike in style A) in this version of the Manual:


Wednesday, July 4, 2012

Manual- Style A

DISCLAIMER: This move can be dangerous. Seek professional instruction. The tips are for the author of the blog to serve as recall tips only. Blogger site degraded video quality that was originally filmed with 12 megapixels...

There are many ways to teach the "manual". This video is how I learned to do it at Endless biking. Fluid Ride teaches it differently.
  1. I practice on small obstacles first so I get a feel for it and don't get hurt if something goes wrong.
  2. Technique: Just before the front wheel rolls over the drop I PUSH ON THE PEDALS DOWN AND FORWARD
  3. It is easier to do with a bit of speed
  4. WARNING: At higher speeds the push on the pedals may produce a very big violent jump, the faster I go the less of a push I exert and I always remember that the bike will be MUCH MORE RESPONSIVE AT HIGHER SPEEDS. 
  5. Become quite small (attack position) before you do the "Manual"
  6. Seat should be low!
Although the obstacle on the video is tiny, I watch the force applied to the pedals by the legs on the video just before the front wheel rolls over the "edge". Timing is everything! I push down and forward with the legs only.

1. Ready Position (I should be lower!):
2. I push down on the pedals:
3. I push then slightly forward on the pedals:
4. Front wheel attitude in the air:
5. Landing in preferably neutral low position (I should not be this far back):

Tuesday, July 3, 2012

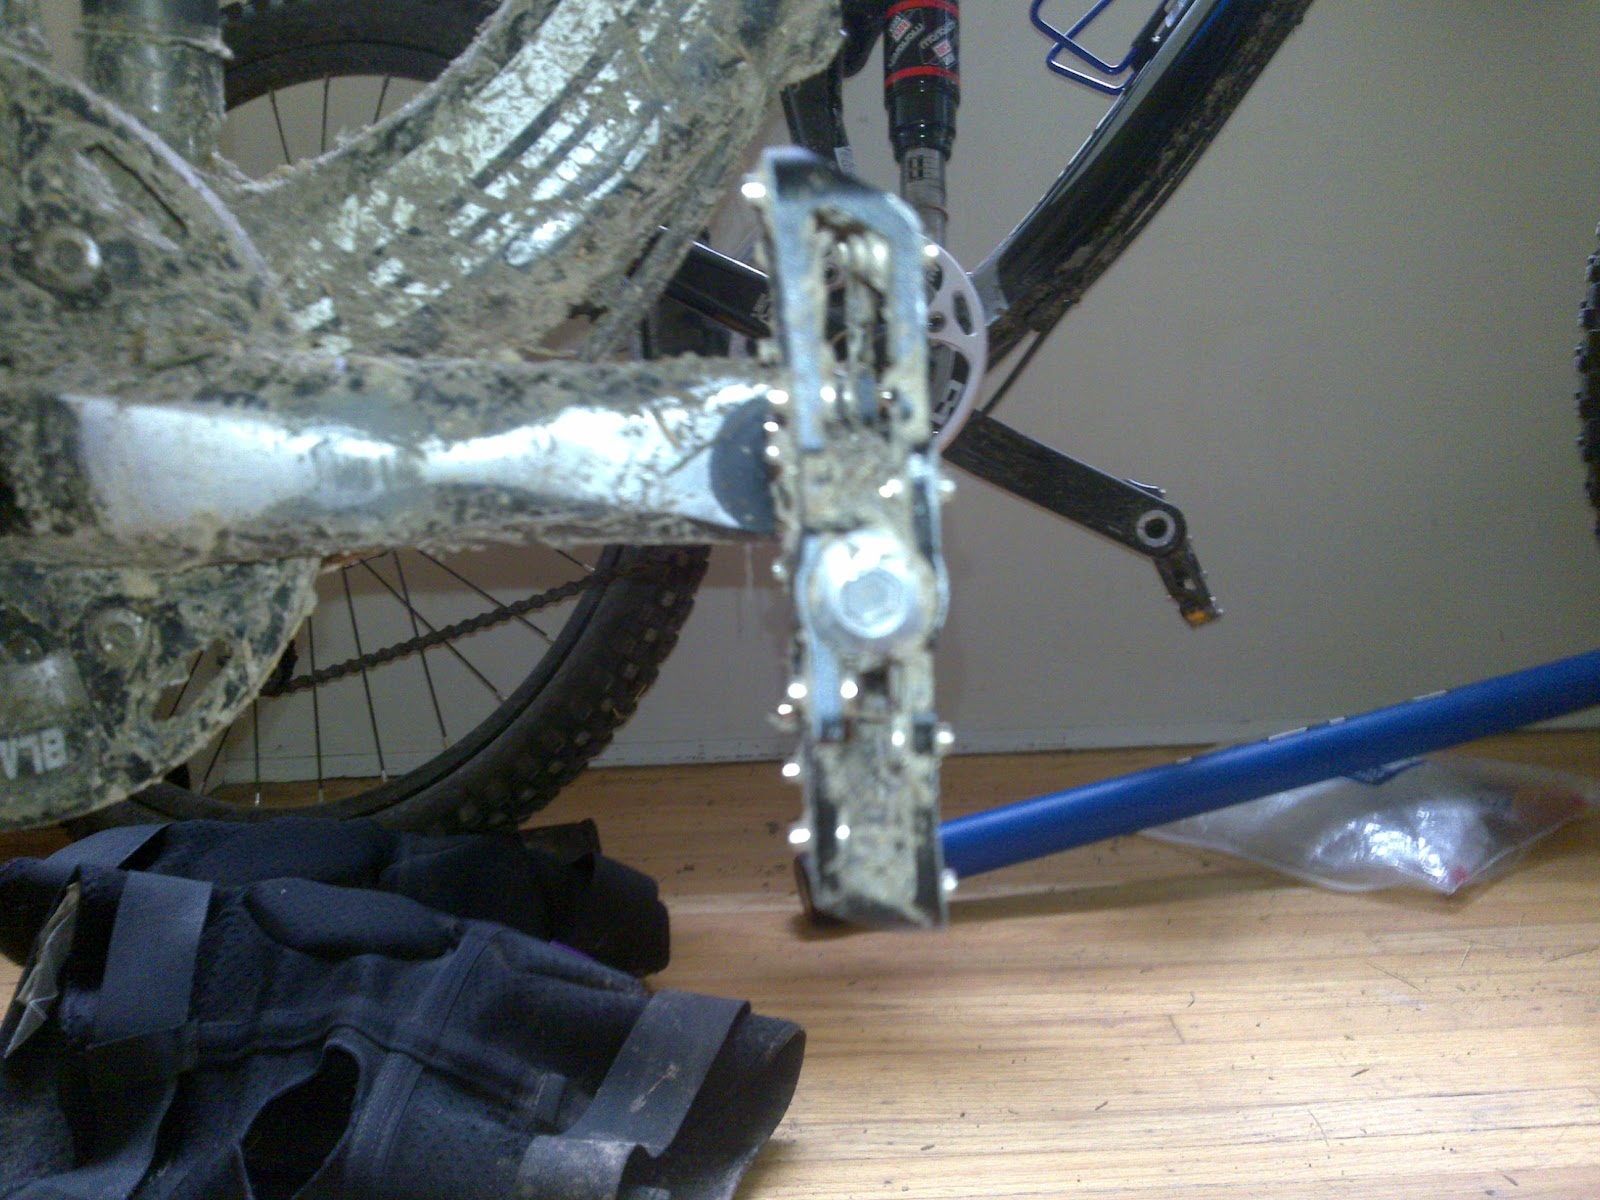
Platform pedals should be "skinny"

It took me almost two years to understand what good platform pedals are. It is not about a brand and type, they will all brake eventually, guaranteed!
It is about how thin or "skinny" they are! It is amazing how you can reduce pedal strikes by sticking to this one feature only. One can appreciate it only after having used "fat" or "fatter" pedals for a while.
For a month or so I have been using these MEC pedals and they work great. Here is the picture of what I consider good "thickness" of a platform pedal (these are Mec Double A pedals as per link above). They also should have a concave shape.

Another pedal that I want to try in the future is Deity Decoy 2.5

Wednesday, June 27, 2012

Rear Shock PSI "surprise" - a pleasant one

I rarely check rear shock pressure. I did it finally after a year or so today. Added 10 PSI (210 is my number). Results? Unbelievable difference in doing "Manuals" (compressing suspension down and forward). The bike has so much pop that I even landed on a rear wheel and did a wheelie! Unintentionally!

Cassette "surprise" meaning replace chain relpace cassette

In 90% of my riding I use the second biggest ring on my rear cassette.
As the chain wore out I obliged, payed $35 and bought a replacement.
With a new chain installed I went for a ride and the "teeth" slipped under load, very very annoying.
I spent some time tweaking shifting tension, shifting is great!
Key idea: I tried to climb using a different ring on the rear cassette, no skipping!

After 30 min of troubleshooting it occurred to me that I may have worn just one ring, the one that I use all the time on Bridal Path.

I stopped blaming rear derailleur, derailleur hanger, cage alignment (the potential absence of thereof) who knows what else... It is possible to destroy one single ring in a multi-speed cassette, what a bummer!

Brake pads "surprise"

Periodically check brake pads. I was checking them as lazy people do, I looked at them without removing the wheel.
The trouble is that by simply looking at the pads from a rider's vantage point not removing the wheel is trouble inviting. Pads may wear out unevenly. Without removing the wheel it may look that there is enough of braking material on the pads but in reality the pads may be completely worn out in the areas where you don't see.

Here comes a surprise. The end of the spring that spreads out the pads may not have enough of the "step" left to stay put as with newish pads and will simply escape, slide in the rotor area and will start making clicking noises. If this happens on a trail, you are in trouble.
Dislodged spring "whisker" is indicated by the arrow on the picture (of course this picture is an imitation and I placed the spring in a crooked way intentionally, to illustrate my point. Observe only the part of the spring indicated by the arrow, in the actual brake it will rub the rotor and the brake is compromised).

Friday, June 22, 2012

Reducing the height of the drop by getting small and extending legs

I found this picture on pink bike . What does it illustrate?
If you watch the amazing DVD created by Simon from "Fluid Ride", you will notice:
  • getting small before the drop and with the subsequent leg extension erasing the height of the drop by quite a bit
  • subsequent leg extension from being very small allows you to dictate bike placement on landing and not just sitting on top of it as an ejection seat
  • basic technique: correct timing, hips back creating pressure on the palms of the hands preventing front wheel dipping
  • linear helmet travel on the diagonal as per "racer style" explanation by Simon