Disclaimer: These tips are for the blog author, pls seek professional instruction as this sport may be dangerous!
These drops can be steep step-like roots, steep rocks and steep ladders.
STAY LOW LOW LOW approaching the drop.
DO NOT move back in advance when you are still riding on flat terrain before the drop. LET THE BIKE DICTATE HOW MUCH YOU NEED TO MOVE YOUR REAR BACK AS YOU GO OVER THE OBSTACLE, NOT BEFORE THE OBSTACLE.
My rear should not be back but balanced over BB.
As you drop pushing straight down on handlebars there is an illusion that the butt moves back, it does not: the bike angles nose down and creates such illusion. If I stay back, front wheel will loose pressure and traction.
The acceptable height of a drop to attempt with such technique can be measured by standing next to it with hands on the same line as the top edge of the drop (imagine that the top imaginary line of the drop edge is the handlebar). Extending arms down should be such that hands touch the bottom of the drop. The drop height should be no more than full arms extension from the top to the bottom of the drop. This also about 2/3 of my knee height. If the drop is BIGGER than the full arm extension this technique should NOT be used.
Doing the drop I get low low low low in the attack position, push the handlebars straight down, (it is a subtle push if it is a rolling long rock or ladder) NOT forward. I Don't move back, I stay neutral hovering over the seat (Bottom bracket) area, and I don't sit.
Assume ready position right after the drop is done. The technique allows for a very quick return to the ready position to address right away other obstacles.
Mistake: moving/shifting back. Getting low WILL move the rear back but as a "side effect". Pushing forward instead of down.
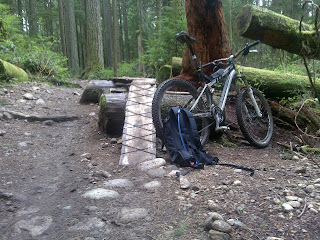
I use the same technique when rolling off the rocks and skinnies (On the picture below I pushed down in a subtle way on handlebars on the final steep part of the skinny (which is by the rear wheel on the picture). I also made sure that I was LOW LOW LOW with (doing a pushup or holding a basketball like) elbows and centrally balanced (not positioned back with extended arms, bad idea!)
Angling the palms on the handlebars can help maintain correct elbow position
On the obstacle on this last picture I used exactly the same technique pushing down on handlebars and being low and centrally balanced.
I use the same technique rolling off relatively long steep rocks and long ladders. There are two adjustments to make. As usual start with chicken wings in a low low low position centrally balanced over BB, then:
1. There is a subtle extension of the handlebars DOWN when the front wheel starts rolling down (as the technique described above) and a bit of a hold as you roll the long rock or long ladder. As the front wheel touches the "landing area" absorb the curve with the arms and get back into low low centrally balanced position with chicken wings.
Slow speed drop technique works on the similar to these features as well:


